Getting started with your first form
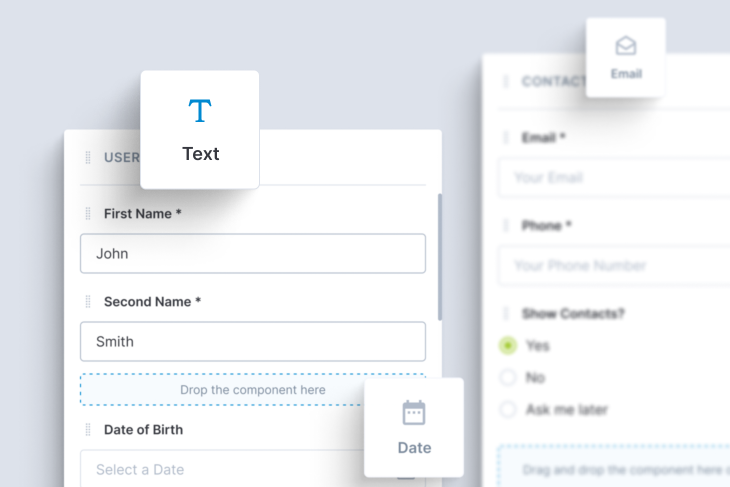
PowForm lets you build versatile form-based web applications in a matter of minutes. The app has an easy-to-use drag and drop feature and a modular layout of components that are intuitive and helps to generate a unique purpose-built branded web app solution for your customers instantly. This short tutorial helps you get started with the platform and building your first form, for an upcoming concert by the popular rock band Kodaline.
Why build a form-based web app?
If you're a business that deals with customers, there would undoubtedly be a need for a number of form-based data entry and processing services across your business. Forms have been around for quite some time, and they still are the best way to collect information and take action. Whether you are a financial institution trying to disburse an advance to a customer or an employer trying to gather employee information, form-based apps are the way to go. PowForm helps you do this and ultimately gives you a branded form-based web app. It allows you to build an app with multiple pages, each containing different form components that can be easily implemented through their drag-and-drop functionality. Once you're happy with the end product, you can choose to export it with the branding of your choice that includes a choice of colours and a logo.
Getting started with PowForm
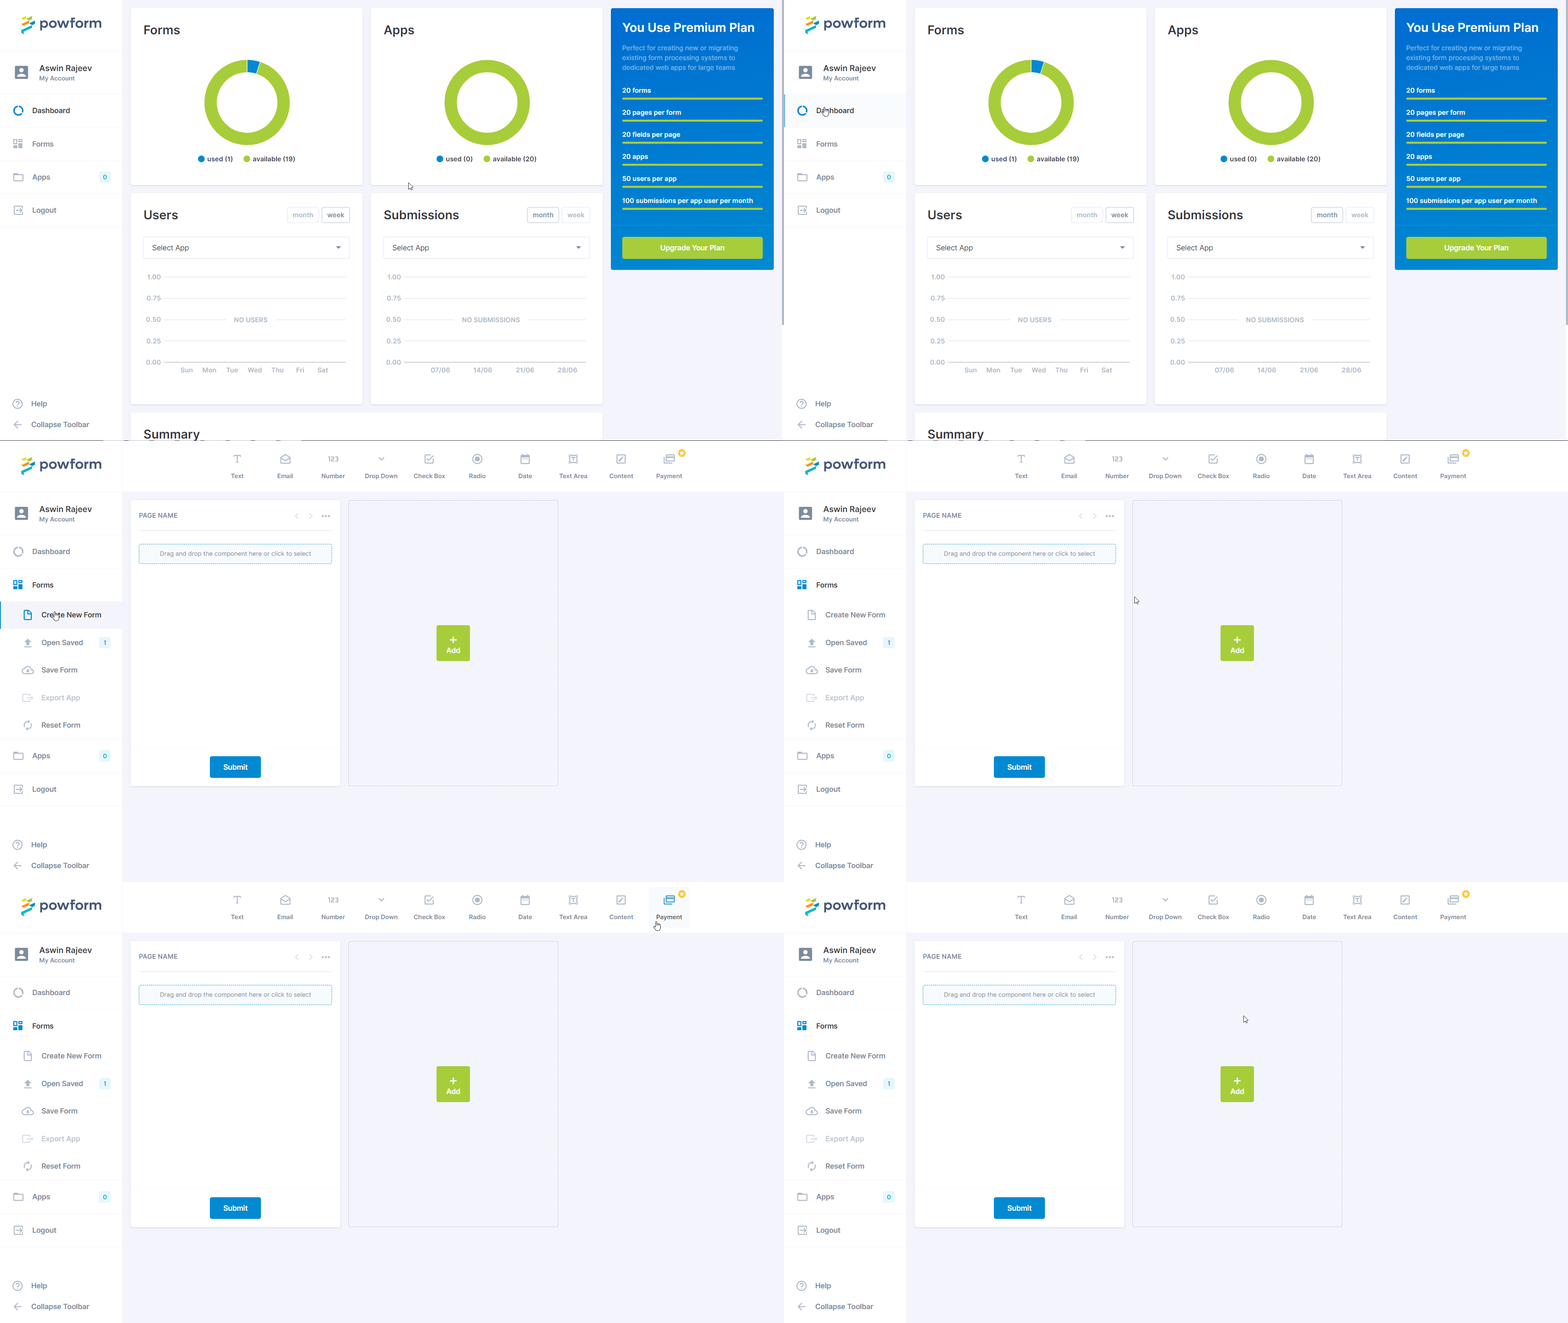
First and foremost, you need to log in to your PowForm account and click on the ‘Go to Dashboard’ button in the top right corner. Once you are in, you will be greeted with an admin panel with a side menu that consists of several options. We will be building a form today, so click on the ‘Forms’ menu item and select ‘Create New Form’.
Building the form from scratch
The form builder page presents the structure of the form with different components laid out across different pages. It gives users the ability to drag and drop each component or click and add a specific component. For this example, we will build a form-based app that allows users to sign up for their interest in an upcoming rock concert by the popular band Kodaline. A number of successful applicants will be invited to attend the event and pay for the tickets via an additional booking confirmation app.
We are going to name our app ‘Kodaline Concert 2021’. The first page of the app will let the user enter their personal details. The second page will ask the users to answer some trivia questions about Kodaline and the last page is for legal purposes.
Personal details
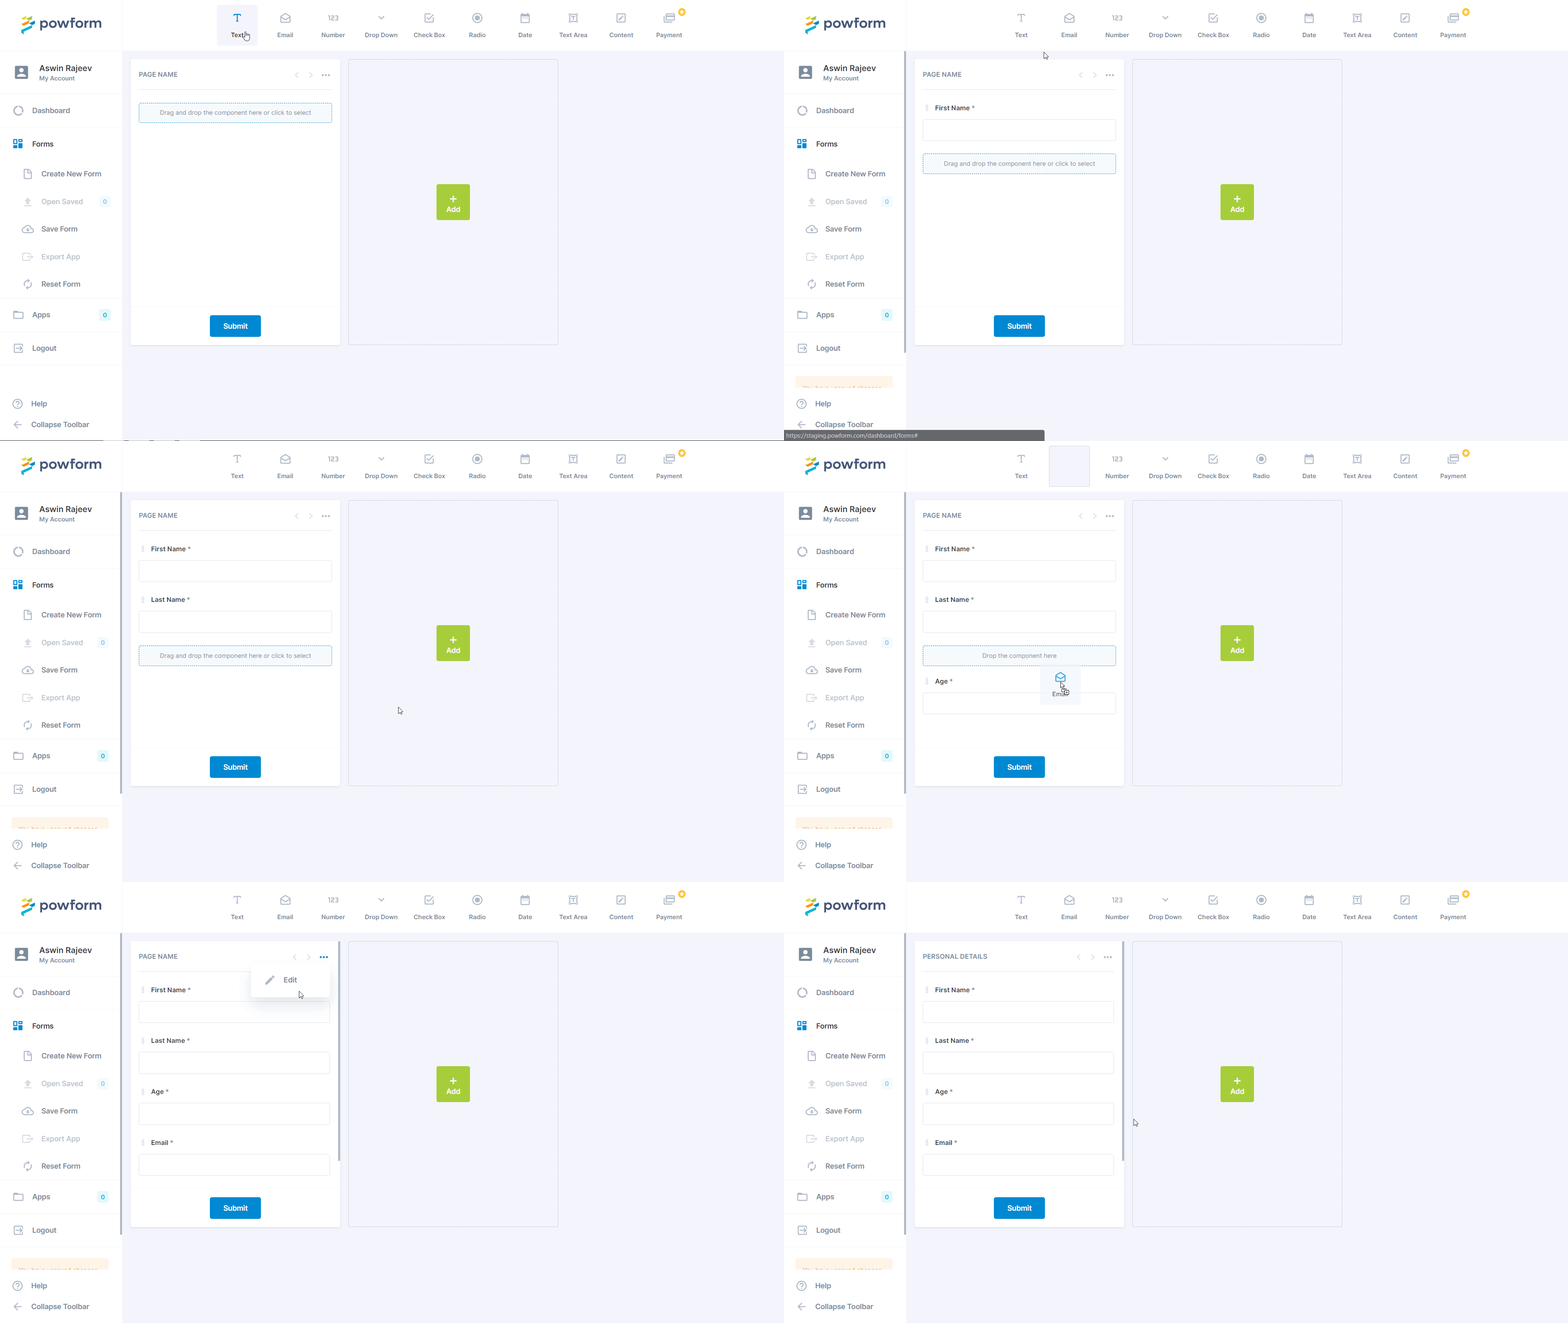
We are going to be using two text fields for first name and last name, a number field for the age, and an email field for the customer’s email address. Drag and drop the text component from the top toolbar and drop it on the first page. We will give it a label of the first name and set it to a required field. We will do the same thing for the last name as well. The next field is for the email address, which we will drag and drop inside the form. This, again, will be set as a required field, and we have a regular expression to check for a valid email format. Lastly, we have the age field, which is a number. Only users aged 16 or above have entry to the concert; this is set as the minimum value.
All the fields can be reordered either with the arrow buttons or by clicking and rearranging at the specified area. Now, we will change the name of the first page using the three dots in the top right corner. We will name it ‘Personal Details’.
Trivia questions
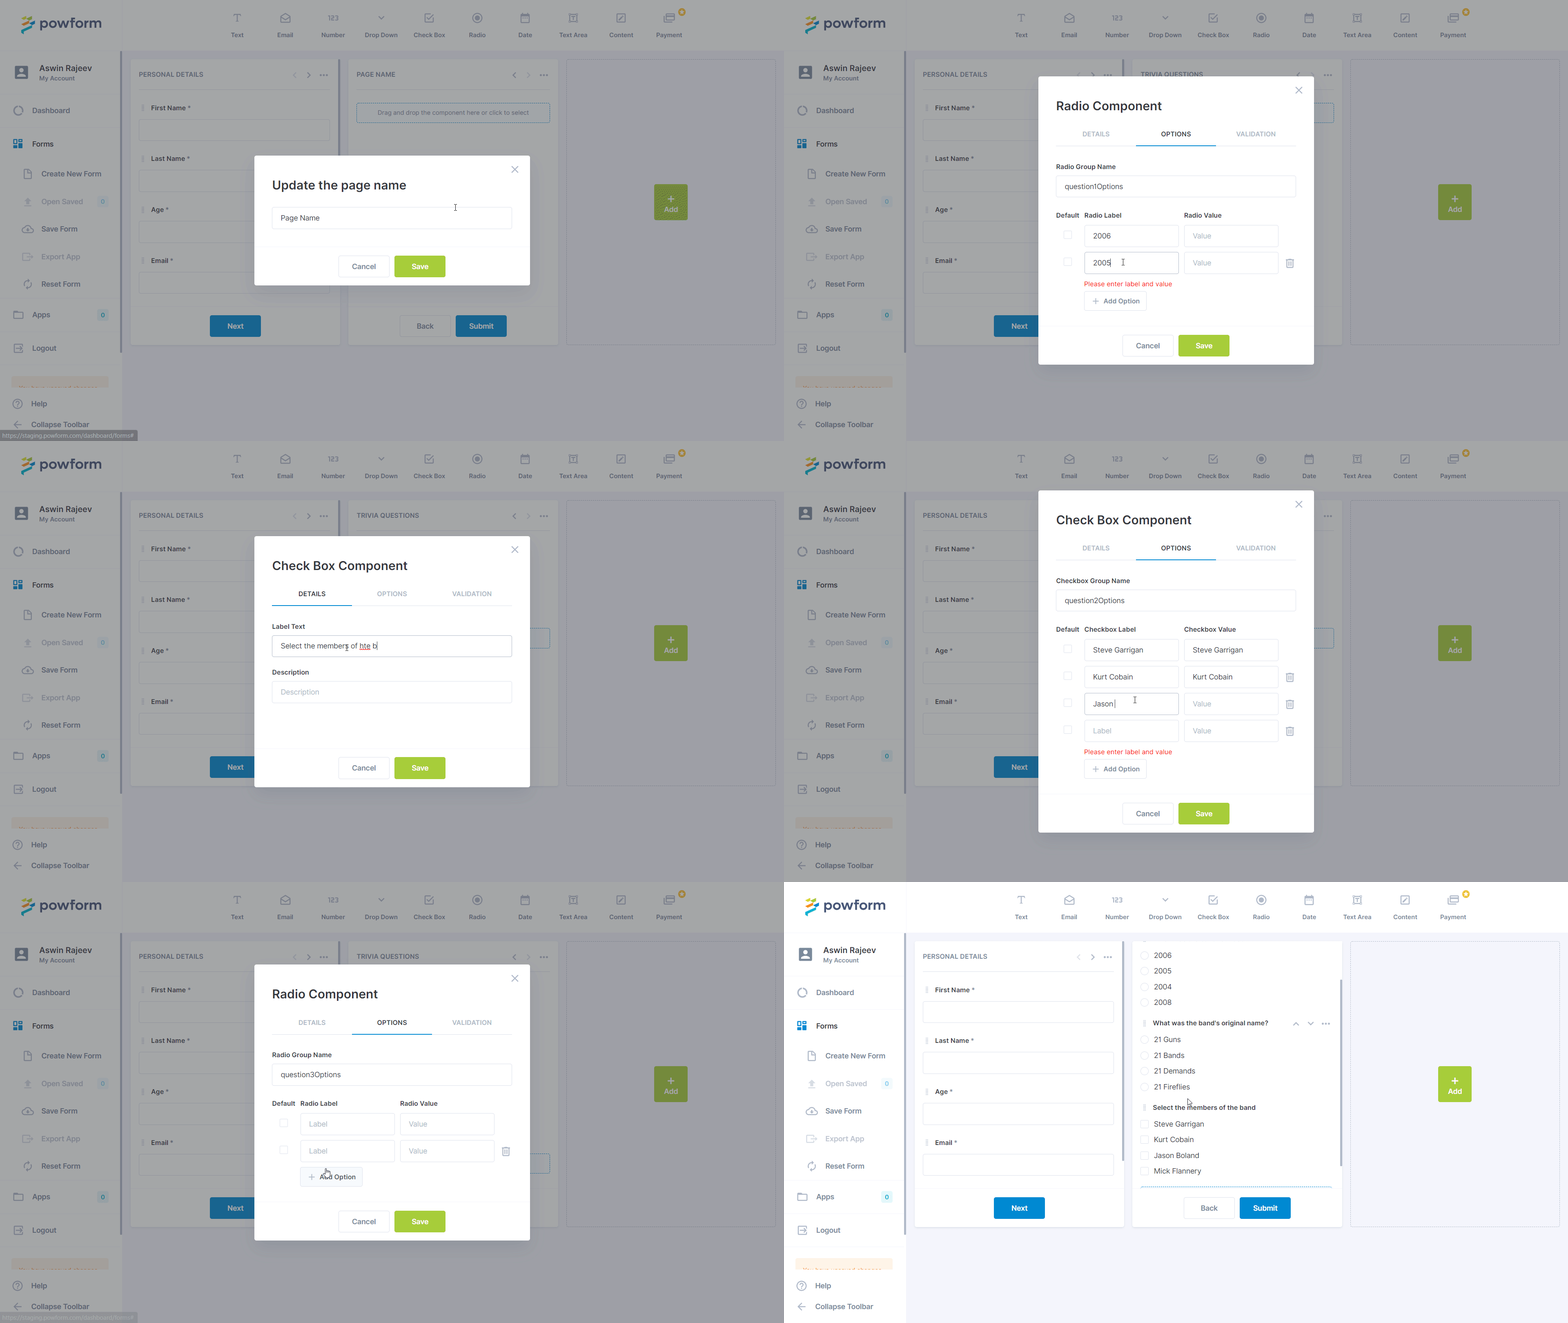
The second page contains a few trivia questions about the band Kodaline. This will be a fun way to test the users about their knowledge about the band. This page contains three questions. The first question has radio buttons giving the user multiple choices. The second question has checkboxes that allow the user to select all the correct options, and the last one is again a radio box with multiple choices. The trivia questions are not required fields because the user does not have to answer these compulsorily and can leave them out.
Legal
This page will have a content component that will display a block of text. This is perfect when you have something like Terms and Conditions on your app. We have added some generic lorem ipsum content inside it and have formatted the heading to be in bold. Under this, we have a radio box with the options yes and no. This is also set to a required field. Lastly, we have an e-signature field that the customer has to fill in with their full name. This is a text area component, and like before, we need to drag and drop it within the form and then set the appropriate label. If you’re using this on a mobile device, instead of dragging and dropping the components, you can click on the form page and add a specific component.
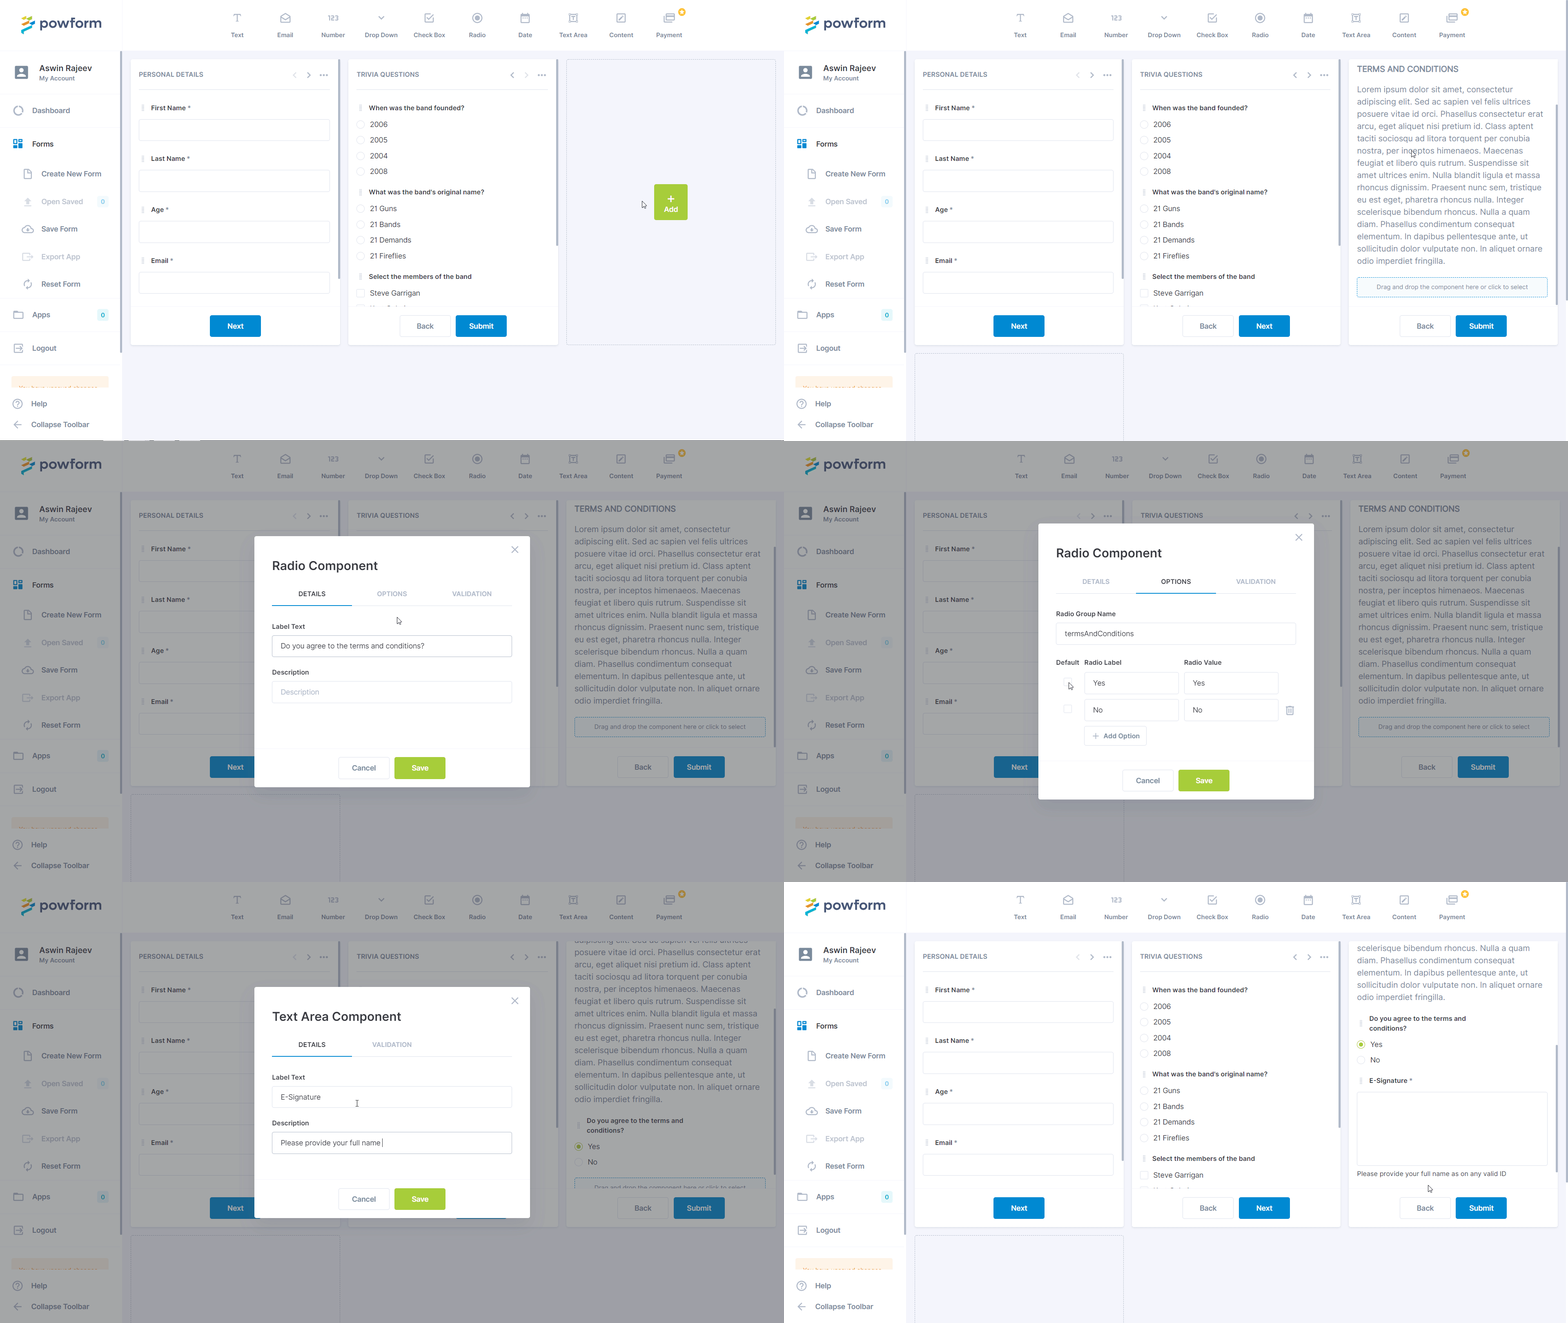
Final steps before publishing your form
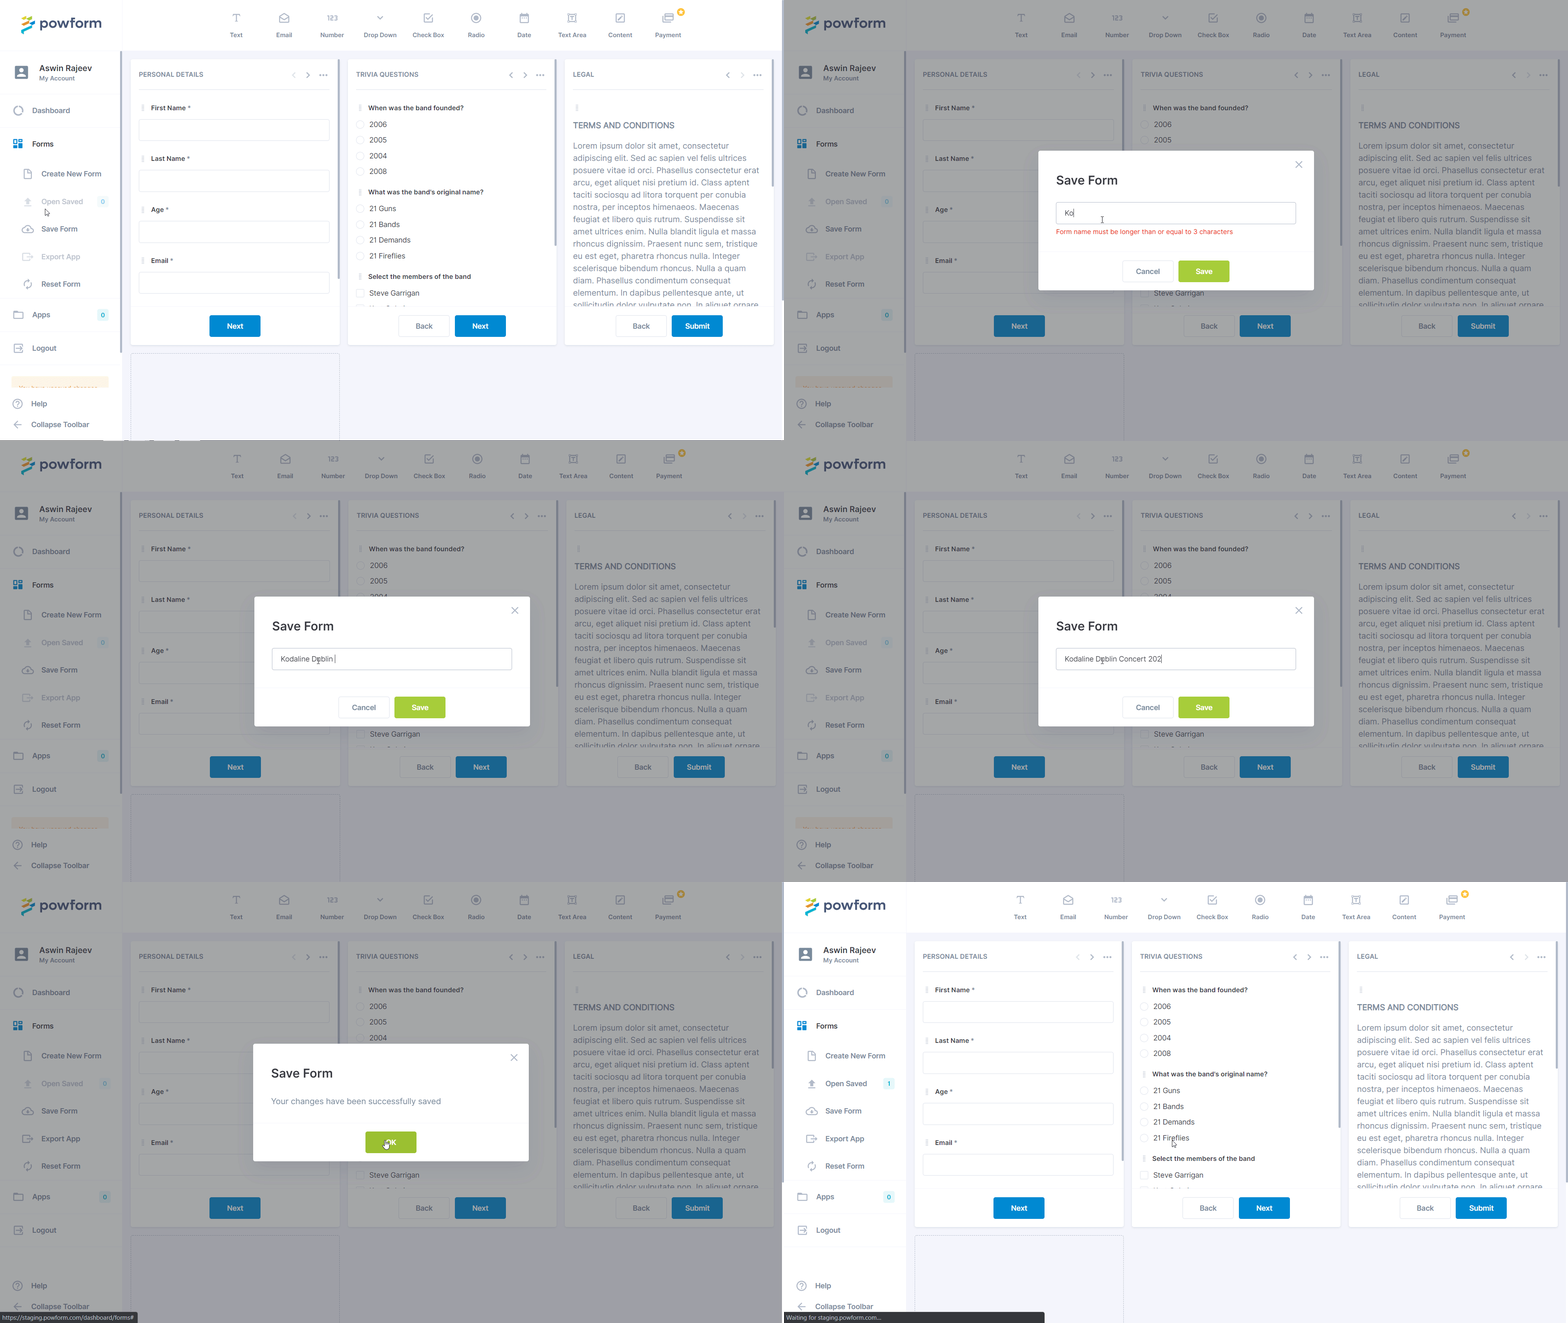
Once the above steps are complete, you can go ahead and save the form by clicking on the ‘Save Form’ menu item on the sidebar. This completes this tutorial on how to build your very first form on PowForm. The saved form can be reopened again, by clicking on the ‘Open Saved’ menu item on the sidebar.
It is important to note that the same process can be followed in a mobile device as well, with an in-place component editing feature that is well suited to smaller screens. In the next tutorial, we will export this form to a branded web application, complete with a logo, personalized colours, and user settings. Furthermore, we can even integrate payments within the app itself that will allow the users to pay for the tickets once it opens up. This will be a part of one of our subsequent articles.
Related Articles
Building a PowForm payment Form
Highly Configurable - No Coding
Build professional and fast branded e-commerce and customer data collection web apps, no coding experience needed. Scalable solutions that can be built and integrated into your business in minutes.
Powform enables you to create branded, interactive, multi-feature apps for mobile and desktop browsers, including all the smart features you need to collect customer data and payments. With the addition of conditional logic you can provide a more tailored experience for your customers.
Our managed secure database allows you to store and analyse all submitted web app data.
Want to store all app data in house?
App submissions can be directed to other business systems via secure authenticated api services.
Contact us today to discuss your custom branded no-code web apps requirements.
